2. Start the anchoring
1. Open QuickNII and load the data
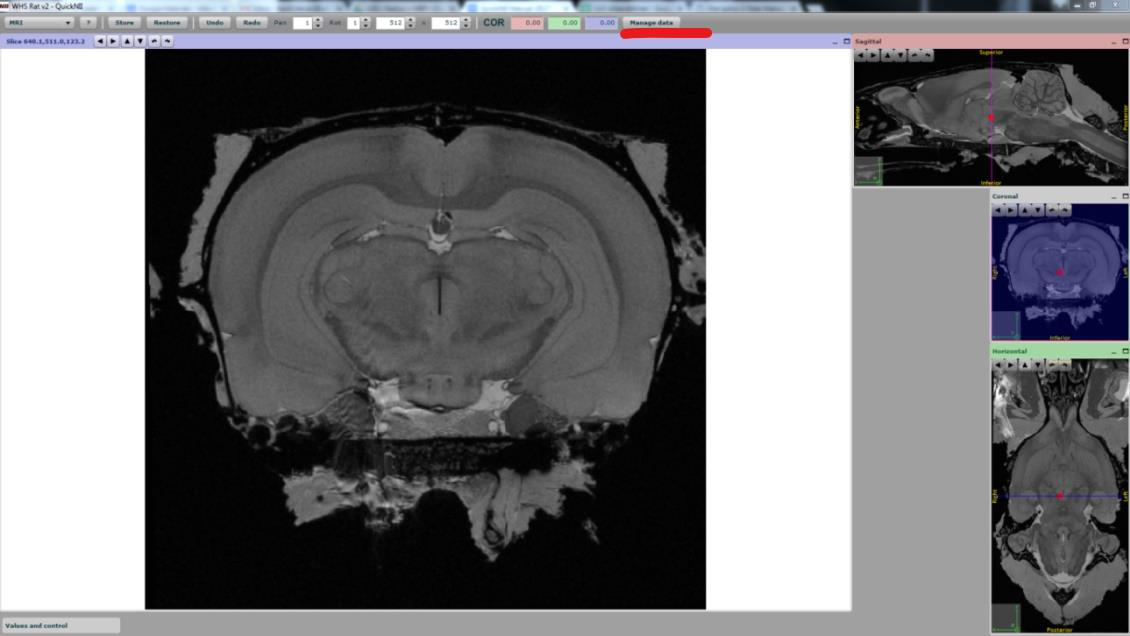
Open the QuickNII program by clicking on the .exe file. Once the program opens, click the Manage data button.
A second window, the data management window, will open. Here you can load your data by clicking the Load button and choosing the xml (or JSON) file related to your images, choose the “orig file” the first time.

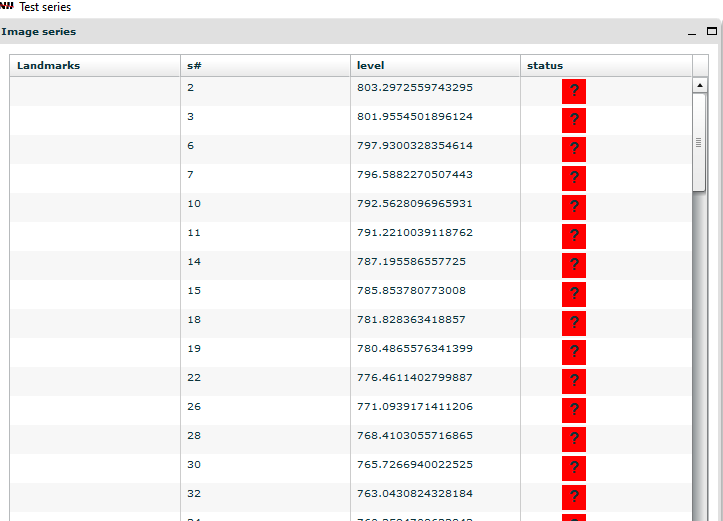
Navigate between the two windows by clicking the Manage data button. Select sections to work on by using double-clicking the section number in the data management window.
2. Use landmarks in the images to find their approximate anteroposterior position
Select your main working plane, i.e. coronal, sagittal or horizontal by going to “values and controls”(5)
The first step in a successful anchoring is to find the approximate anteroposterior position of the slices (Y position for coronal sections). Do this first for the first and last section of the series (or first and last sections with clear landmarks). Select sections to work on by using the arrows in the upper right panel or by double-clicking the section number in the data management window.

- Choose your orientation: By clicking on the “Values and control” (5) button
in the bottom left corner, choose the section orientation (coronal, sagittal or horizontal).
- Adjustment of the anteroposterior position
The anteroposterior position is adjusted by clicking and sliding the red circle in the sagittal navigation window (1). After finding the approximate position of your section, determine whether the midline of the section is completely vertical. If not, the rotation of the template can be adjusted using the rotate left/right-buttons (2).
- The atlas proportions might need adjustment to fit the section.
This is done separately for the horizontal and vertical direction by using the scaling buttons (3). In order to scale your atlas, press the space bar while holding the mouse pointer over the place you want the reference point for scaling. A small cross will appear. Usually it is easier to choose a side and not place the cross in the middle of the section. Then, click on the scaling button: a double arrow will appear. Place your mouse pointer at the opposite side of the double cross, and press the left button of your mouse. While keeping the left button of the mouse pressed you can now gently drag the atlas in the direction indicated by the double arrow. To drag in the other direction, choose the other arrow.
- The transparency slider (4)
it can be used at any time, in order to determine how well the atlas fits the section.
- The “outline” button (5)
This will allows you to shift between an outline view and a color view of the atlas segmentations.
- Contrast adjustments (5)
Both the experimental image and the template can be adjusted with sliders. Making the MRI template darker or lighter can be helpful sometimes.
- Save the anchoring (6)
Save by clicking the Store button in the upper left panel: a green exclamation mark appears in the upper right panel.
